✿¸.•´ི♥All About Me♥ྀ `•.¸✿

- ✿¸.•´ི♥Sexy Ash♥ྀ `•.¸✿
- Mackay, QLD, Australia
- Heya..Im Sexy Ash and im addicted to psp heehee.. ive been psping for about 5 or so yrs now and i love it.. Im a mum of a beautiful 5 yr old Hannah and she occupies most of my time. So i use psp to escape lol. Here ull find all my Tuts and Temps. If you have any questions please feel free to ask me!!
✿¸.•´ི♥TOU♥ྀ `•.¸✿
Please respect the time and effort that goes into these tutorials.
The creation, concept, and ideas of these tutorials is of my own imagination and design.
Should anything resemble another tutorial, this is only pure coincedence.
DO NOT copy my tutorials anywhere on the web or claim as your own!
I DO NOT give permission for my tutorials to be translated.
Please NO hotlinking, this is bandwidth theft!
DO NOT use my tutorials/ideas/supplies for commercial use or any other monetary gain
✿¸.•´ི♥Chat Box♥ྀ `•.¸✿
✿¸.•´ི♥Lables♥ྀ `•.¸✿
- Addictive Pleasures - Tutorial
- Collab Templates
- Crafty Chick Exclusive Tag Templates
- FTU tutorial
- Juicy Bits Exclusive Tag Template
- Misfit - Templates
- No Scraps Tutorial
- Pink Pleasure - Tutorial
- Pink Princess Scraps - Tutorial
- PMTWS - Tutorial
- Scraps With Attitude - Tutorial
- Tag Template
- Toxic Desirez - Tutorial
✿¸.•´ི♥Music♥ྀ `•.¸✿
Thursday, October 8, 2009
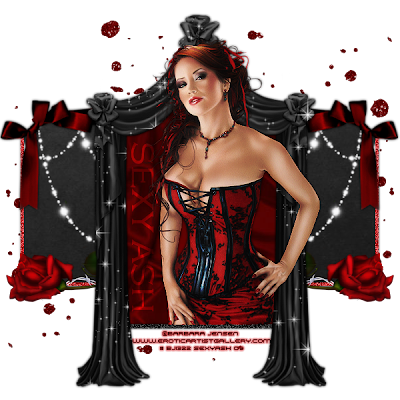
 Passion

This tutorial is for those that have a working knowledge of Psp.
Supplies needed:
Tube of choice. I’m using the artwork of Barbra Jensen. You have to purchase a license to use her work here
My Heart Bleeds For You Scrapkit - is made by Tamie and Vicki and can be purchased here
Template # 85 by Kristin - download for free from her blog Toxic Desirez
ok here we go...
Open your template in psp and change the canvas size to 600 by 600 to give you more room to work.
Copy and paste your tube onto your canvas and place into the pink square. Add Xero - Randiance with these settings 247,47,143,203 and delete excess - Add a dropshadow.
Now take the Black curtain element and resize by 80% and cover the pink square. Delete the corners of the pink square and its borders. Add dropshadow to the element.
Now copy and paste a paper into the pink square and invert - delete. Also i deleted the tone layer.
Next copy and paste a paper into the black rectangle and delete excess. Delete original layer. Add a thick gradient glow to your rectangle and then i added 100% noise just to the gradient glow section.
Copy and paste the cornered red bow onto your tag and resize by 80% three times and place on one of the top corners again deleting the point of the corner on the black rectangle. Repeat this for the other side aswell.
Take the glittered splatter and place underneath all the layers so its on the bottom and duplicate - mirror - flip and spread it out until your happy.
Now take the glittered weavy line element and place ontop of the black rectangle so it looks like its hanging.. duplicate and mirror. Make sure u delete the excess off the sides of the rectangle.
Lastly you want to grab the rose with the barb wire around the stem and resize by 50% and place again on the black rectangle but under the velvet curtains. Duplicate and mirror. Merge together and add a dropshadow.
Add your copyright and license number and name
Then to save with a transperent background you just hide the white background - merge visable - delete the white background - then save as .png
Finished
Thankyou
This tut was created on October 2009
Wednesday, October 7, 2009
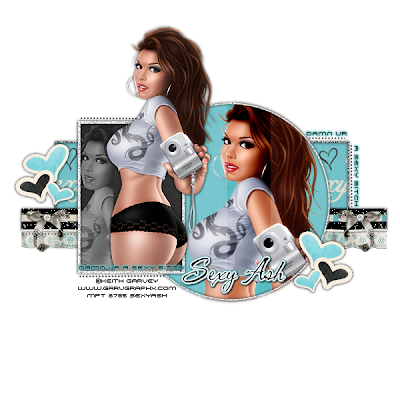
 Sexy Bitch

This tutorial is for those that have a working knowledge of Psp.
Supplies needed:
Tube of choice. I’m using the artwork of Keith Garvey. You have to purchase a license to use his work at MPT
Girls on Film Scrapkit - is made by TammyKat and can be purchased here
Template # 4 by Mirella - download for free from the Creative Misfits blog
Diamond of choice
ok here we go...
Open your template in psp and change the canvas size to 600 by 600 to give you more room to work.
Copy and paste your tube onto your canvas and place to the left - delete excess. Use Xero - Radiance with these settings 194,87,74,196. Add dropshadow.
Now Copy and paste your tube again into your cirlce and delete excess. Duplicate and add guassian blur set on 3 and change the blend mode to soft light.
Delete line 1 and on line 2 change the blend mode to burn and change the opacity to 100%
Then on the faded rectangle in the square place your tube under the faded rectangle and delete excess so its in the shape of the faded rectangle. Change then blend mode on the faded recangle to Hue (legacy).
Now fill all the shapes with papers from your scrap kit leaving the borders.
I added 100% noise to all the borders and added a light dropshadow.
Then on the second thinnest rectangle just add a dark colour from your tube and add Xenofex-Constillation on these settings 2.00,100,,1,12,100,28
Next i took the lace border and placed it at the bottom of the black rectangle and delete the overhang on the sides.
Now copy and paste a bow of choice from your kit and resize by 50% twice and place to the right - add a small diamond to the middle of the bow where the knot is and merge the bow and diamond together.. then duplicate and mirror to the other side.
Next take the 3 heart element and resize by 50% and place in desired position.
I also added wording to my tag but thats totally upto you :)
Add your copyright and license number and name
Then to save with a transperent background you just hide the white background - merge visable - delete the white background - then save as .png
Finished
Thankyou
This tut was created on October 2009
Then to save with a transperent background you just hide the white background - merge visable - delete the white background - then save as .png
Finished
Thankyou
This tut was created on October 2009
Monday, October 5, 2009
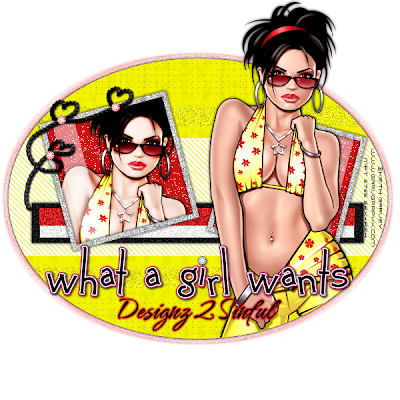
 What a Girl Wants

This tutorial is for those that have a working knowledge of Psp.
Supplies needed:
Tube of choice. I’m using the artwork of Keith Garvey. You have to purchase a license to use his work at MPT
Teen love Scrapkit - is made by Tammy and Missy at Scraps with Attitude
Template # 257 by Missy - download from her blog here
ok here we go...
Open your template in psp and change the canvas size to 600 by 600 to give you more room to work.
Copy and paste your tube onto your canvas and place to the right. Delete excess and add dropshadow.
Select the small square on the left and copy - paste your tube again into the square. delete excess and then add Xero- Radience with these settings 143,26,198,132. Duplicate and change the top layer to soft light.
Now fill both the small squares with a colour or paper of choice and add Xenofex-Constillation with these settings 1.98,2,1,4,100,46.
Now select the border of one of the squares and add a paper of choice then add 50% noise and a dropshadow.
Now to the middle rectangles all i did was colour and add 50% noise then added a dropshdow.
Next we move onto the oval shape. Copy and paste a paper of choice and delete excess. Now useing your selection tool (rectangle) select a section in the middle of the oval and add Penta's Jeans filter with the setting of 255,8.
Now select a rectangle section at the top of the oval and add weave on this setting 1,8,1 with a colour that matches your tube. Do this again at the bottom of the oval also.
Now inbetween the jeans and weave effects select a small rectangle between them and add 50% noise.. do this for the bottom aswell.
Now add elements of choice until happy.
Add your copyright and license number and name
Then to save with a transperent background you just hide the white background - merge visable - delete the white background - then save as .png
Finished
Thankyou
This tut was created on October 2009
Friday, October 2, 2009
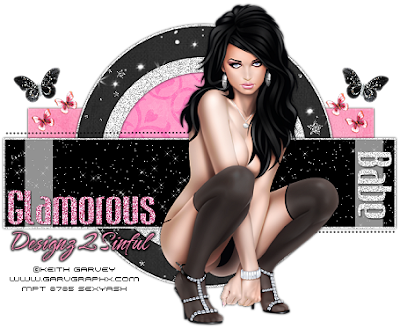
 Glam Babe

This tutorial is for those that have a working knowledge of Psp.
Supplies needed:
Tube of choice. I’m using the artwork of Keith Garvey. You have to purchase a license to use his work at MPT
Glamorous Scrapkit - is made by Candy Kisses Designs you can purchase this kit from Scraps With Attitude
Template # 1 by Mirella - you can download this temp from the Creative Misfits Blog here
ok here we go...
Open your template in psp and change the canvas size to 600 by 600 to give you more room to work.
Then useing either colours or a scrap kit of choice fill in all the shapes on you template.
Note- Leave the main rectangle empty
Now copy and paste your tube onto your tag and place to the right so it doesnt cover any of the wording. Useing Xero-Radience add to your tag with these settings 139,165,40,220. Add a drop shadow
Now on the main rectangle you left empty add a plain colour of choice and then add Xenofex - Constellation with these settings 2.00,71,1,3,100,53 (keep original image).
Then on all the borders i left them white and just added 100% noise and dropshadows.
On the middle smaller circle i added a colour and then a paper over the the top and changed the blend mode to the paper to softlight.
Now for the wording. Add a colour or paper of choice and then i added 100% noise again and a dropshadow of 1,1,100,3.00 colour black
Next we are going to add elements.
Select your big circle and copy and past the sparkle tube - duplicate and cover the circle until happy.. delete excess and sharpen once.
Next we are going to do the butterflys i used the pink and black and all i did was resized by 50% twice and placed on both sides.
Add your copyright and license number and name
Then to save with a transperent background you just hide the white background - merge visable - delete the white background - then save as .png
Finished
Thankyou
This tut was created on oct 2009
Subscribe to:
Comments (Atom)
✿¸.•´ི♥Contact Me♥ྀ `•.¸✿
If you have any troubles or want to send me your results to my tuts then please feel free to email me and ill get back to you as soon as i can. Ty
ashleymarlin@bigpond.com