✿¸.•´ི♥All About Me♥ྀ `•.¸✿

- ✿¸.•´ི♥Sexy Ash♥ྀ `•.¸✿
- Mackay, QLD, Australia
- Heya..Im Sexy Ash and im addicted to psp heehee.. ive been psping for about 5 or so yrs now and i love it.. Im a mum of a beautiful 5 yr old Hannah and she occupies most of my time. So i use psp to escape lol. Here ull find all my Tuts and Temps. If you have any questions please feel free to ask me!!
✿¸.•´ི♥TOU♥ྀ `•.¸✿
The creation, concept, and ideas of these tutorials is of my own imagination and design.
Should anything resemble another tutorial, this is only pure coincedence.
DO NOT copy my tutorials anywhere on the web or claim as your own!
I DO NOT give permission for my tutorials to be translated.
Please NO hotlinking, this is bandwidth theft!
DO NOT use my tutorials/ideas/supplies for commercial use or any other monetary gain
✿¸.•´ི♥Chat Box♥ྀ `•.¸✿
✿¸.•´ི♥Lables♥ྀ `•.¸✿
- Addictive Pleasures - Tutorial
- Collab Templates
- Crafty Chick Exclusive Tag Templates
- FTU tutorial
- Juicy Bits Exclusive Tag Template
- Misfit - Templates
- No Scraps Tutorial
- Pink Pleasure - Tutorial
- Pink Princess Scraps - Tutorial
- PMTWS - Tutorial
- Scraps With Attitude - Tutorial
- Tag Template
- Toxic Desirez - Tutorial
✿¸.•´ི♥Music♥ྀ `•.¸✿
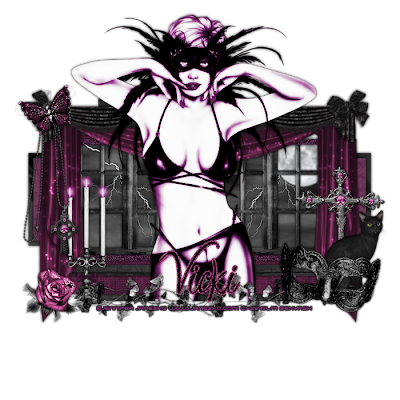
 Nocturnal Slumber
 This tutorial is for those that have a working knowledge of Psp.
Supplies needed:
Tube of choice.
I’m using the artwork of Jennifer Janesko. You have to purchase a license to use her work at CILM
Nocturnal Clumber by Vicki and can be purchased at Pink Princess Scraps
Template # 29 by Me
Ok lets gets started
Open Temp - Change canvas size to 700 by 700
Delete Circles and Stars.
Copy paste your tube and place in the middle - duplicate and colourise to match the colours of your kit - change blend mode to soft light. Back on the original colourise to hue - 0 and sat - 0 and add a dropshadow.
Add papers to the shapes in your temp - do this by selecting the shape - float - defloat - copy - paste a paper - invert - delete - select none - delete original.
On raster 2 add Mura's Cloud effect with colours from your kit.
Elements
49- resize by 80% and place where mine is - drag layer under the tube.
13 - resize by 50% - place on the left over the curtains.
46- resize by 50% - rotate by 20% left and place over the top of the chain to element 13.
32 - resize by 50% - rotate 10% right nd place in the right bottom corner.
10 - resize by 50% twice and Guassian Blur by 1 - add dropshadow - drag the moon under the curtain in the top right corner.
20 - resize by 50% and place in the cloud rectangle - duplicate and mirror - delete excess.
18 - Resize by 50% and then 80% - place over the cloud rectangle on the left - duplicate - mirror - merge together and delete excess - drag this layer under the curtains.
54 - resize 80% and plave over the bottom of your tube.
52 - resize by 50% twice - sharpen and place on the bottom left corner.
41 - Resize by 50% twince and place under the mask on the right.
38 - Resize by 50% - place under cat.
34 - Resize by 50% and place where mine is.
Add your copyright and license number and name.
Then to save with a transperent background you just hide the white background - merge visable - delete the white background - then save as .png
Finished
Thankyou
This tut was created in March 2010
 Vintage Scarlet

This tutorial is for those that have a working knowledge of Psp.
Supplies needed:
Tube of choice.
I’m using the artwork of Keith Garvey. You have to purchase a license to use his work at MPT
Vintage Scarlet by Vicki and can be purchased at Pink Princess Scraps
Template # 19 by Me
Ok lets gets started
Open Temp - Delete Wordart, dotted circles and the two thin rectangles.
Copy paste your tube onto your tag and add a dropshadow.
Select the blue large rectangle - float - defloat and copy - paste a paper from your kit - invert - delete - while inverted copy and paste a closeup tube from the same artist - place to the left - delete excess - select none - duplicate tube - mirror - merge together and add Xero-Radiance on default to your close up tube layer. Add blinds 2,20,black.
select large black rectangle - copy - paste a paper of choice -invert-delete-invert-modify-contract by 3-invert-add 100% noise - select none and delete original shape.
Repeat the above step to the remaining shapes in your template.
Elements
Element 21 - Resize by 50% - place to the left on the top of the top rectangle - duplicate - mirror - merge together and add a dropshadow.
Element 1- Copy and paste onto your tag - drag layer to the bottom - duplicate - mirror - merge together and add a dropshadow.
Element 50 - Place to the right bottom corner - duplicate - mirror - use eraser tool to delete the etra bits you dont want on either side.
Element 13 - Resize by 50% place to the right under the ribbon/bow - duplicate and mirror.
Element 45 - Resize by 50% and place behind the main tube like mine - duplicate and mirror.
Element 9 - Resize by 80% and place at the bottom of the top rectangle.
Element 6 - Resize by 50% and place to the right ontop of the end of element 9 - duplicate - mirror - merge together - shapen once.
Element 40 - Resize by 50% place in the right side of the top rectangle - duplicate - mirror - merge together - colourise to make your tag - drag layer until its just above the rectangle.
Element 4 - Resize by 50% twice and place to the right - drag layer under the ribbon and place where mine is - duplicate and mirror - merge together - then add Xero-Radiance on default. Add dropshadow.
Add your copyright and license number and name.
Then to save with a transperent background you just hide the white background - merge visable - delete the white background - then save as .png
Finished
Thankyou
This tut was created in March 2010
 Classic Hollywood

This tutorial is for those that have a working knowledge of Psp.
Supplies needed:
Tube of choice. I’m using the artwork of Gennadiy Koufay. You have to purchase a license to use this artwork at CILM
Material Girl 2 kit can be purchased at Vicky's blog Pink Princess
Template # 8 by make my Me
Open Temp and change canvas size to 700 by 700
Delete the Heart Shape.
Copy and paste your tube and add Xero - Radiance on 216,77,96,129 and add a dropshadow - move you tube to the left.
Fill in all your shapes with papers from you kit and add glittered edges to all of you shapes.
Glittered edges - Select the shape - float - defloat - modify - contract by 3 - invert - add 100 % noise - select none - add dropshadow and delete original layer.
Elements
Element 30 - Resize by 50% and place over the top of the rectangle. - select rectangle - invert -and delete the excess element - select none - duplicate - flip and merge together - change blend mode to multiply and add a dropshadow.
Element 7 - Place in the top thin rectangle - delete excess - duplicate - flip.
Wine glasses and chardonnay bottle - Resize the glass by 50% twice and the bottle by 50% once - sharpen both once - place them all to the right bottom and then rotate the glass by 5% left - duplicate - mirror and place next to eachother.
Rose - Resize by 50% three times and place over the bottom of the bottle - duplicate - mirror and place next to the original.
Reather - Resize by 80% and drag that layer to the bottom - move to the right - duplicate and mirror.
Add your copyright and license number and name.
Then to save with a transperent background you just hide the white background - merge visable - delete the white background - then save as .png
Finished
Thankyou
This tut was created in March 2010
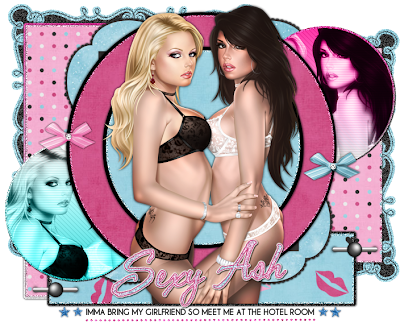
 Hotel Room

Then to save with a transperent background you just hide the white background - merge visable - delete the white background - then save as .png
Finished
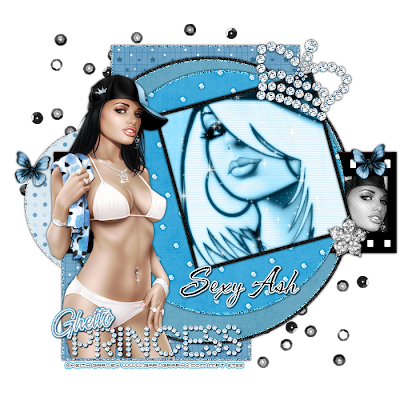
 Ghetto Princess

Supplies needed:
Tube of choice. I’m using the artwork of Keith Garvey. You have to purchase a license to use his work at MPT
Delete the word art, small circle "2" and the tone layer.
Thankyou This tut was created in Feb 2010
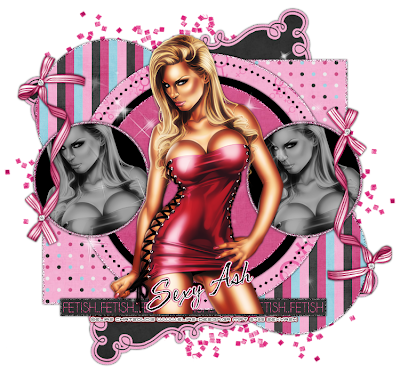
 Fetish

This tutorial is for those that have a working knowledge of Psp.
Supplies needed:
Tube of choice. I’m using the artwork of Elias Chatzoudis. You have to purchase a license to use his work at MPT
Fetish Kit can be purchased at Vicky's blog Pink Princess
Template # 326 by Missy - download for free from her blog Divine Intentionz
Open Temp and change canvas size to 700 by 700
Delete the hearts and the word art.
Take your tube and place into the moddle and delete excess. Now select one of the small circles on the side and copy and paste your tube into the shape invert - delete. Select none and add Xero- Radiance with these settings 128,50,128,255 then change the blend mode to luminace (legacy) and opacity to 70%. Add a paper of choice to the background of the circle and add a dropshadow. Repeat to the other Circle.
Fill the remaining shapes with papers from your kit and add glittered egdes to all of the shapes and you do that by selecting the shape - float - defloat - modify - contracy by 3 or 4 (depending how fat you want your boarder) invert and add 100% noise. Select none and add a dropshadow.
Select element 27 from the kit and resize by 80% twice and rotate by 5.00 to the right. Adjust sharpness and sharpen once. So the same for the other size except rotate to the left and mirror.
Take a diamond of choice and add to the middle of the bows.
Copy and paste element 71 rotate 15.00 to the left - sharpen and add a dropshadow and place underneath all the layers.
With element 37 placeunderneath your main tube and sharpen once.
Take element 24 and copy and paste onto your tag and place underneath all the layers and place toward the top corner - duplicate - mirror - flip.
Lastly choose a word that goes with you tag (i used Fetish) and add it to the thin rectangle. Then i added 70% noise.
Add your copyright and license number and name. Then to save with a transperent background you just hide the white background - merge visable - delete the white background - then save as .png Finished
Thankyou This tut was created in Feb 2010
 Pop My Cherri
This tutorial is for those that have a working knowledge of Psp.
Supplies needed:
Tube of choice. I’m using the artwork of Keith Garvey. You have to purchase a license to use his work at MPT
Pop My Cherry Scrapkit - is made by Vicky and you can purchase it from Pink Princess Scraps
Template # 45 by Melissa - download for free from her blog here
ok here we go...
Open your template in psp and change the canvas size to 600 by 600.
Copy - paste your tube onto your canvas and resize by 80% - sharpen. Now place into the bottom square and delete excess.
Useing another tube select the top square - float - defloat - copy and paste your tube into the square -invert and delete. Now useing Xero-Porcelain with these settings 50,128,128 press ok.
Now select your circle and add raster layer - add colour and noise at 40%. Back on the original layer bring ontop of the glittered circle and resize by 95% and add a paper of choice. Add dropshadow and delete origianl layer
Now useing papers from your kit fill in the rest of the shapes adding dropshadows and deleteing original layers on the way.
Now take the big bow and copy - paste and mirror. Add dropshadow. Then useing a diamond copy and paste onto canvas and resize and place in the middle of the bow.
I also added handcuffs and the curtain elements
Add your copyright and license number and name
Then to save with a transperent background you just hide the white background - merge visable - delete the white background - then save as .png
Finished
Thankyou
This tut was created on August 2009
 Rockin it girly style
This tutorial is for those that have a working knowledge of Psp.
Supplies needed:
Tube of choice. I’m using the artwork of Elias Chatzoudis. You have to purchase a license to use his work at MPT
Rockin it girly style Scrapkit - is made by Vicky and can be purchased at Pink Princess Scraps
Template # 2 by Melissa - download for free from her blog here
Open your temp and change the canvas size to 600 by 600
Now on your temp delete the skulls and the wordart layers we dont need them for this tag
Then add your tube place in the middle of you tag and add Xero-Bad Dream with these settings 178,40 No colour. Add a drop shadow
Ractangles: Add a paper of choice and then on the original layer add a thick gradient glow and noise at 40%. And on the paper layer add penta-colourdot with these settings 90,7,255,255,255
Bigger Square: Select all - float - defloat Useing a paper from your kit copy - paste onto your tag over the square invert - delete. Add a gradient glow and dropshadow
Smaller Square's Frame: Add a paper and noise at 35%. Add a dropshdow.
Smaller Square: Choose two colours from your tube and in your materials make a gradient angel at 45 and repeats at 4. Add this to your square and then useing Xero-Fritallary set at 5,30,10,10 add this to your square.
Now take your rainbow element and add it to your tag and place to the left and delete any excess raidbow you dont want.
Then take your diamond circle - resize by 80% and place at the bottom of all your layers. i deleted the top and botton so it only shows on the side of the tag.
Now useing any other elements of your choosing finish off your tag.
Add your copyright and license number and name
Then to save with a transperent background you just hide the white background - merge visable - delete the white background - then save as .png
Finished
Thankyou
This tut was created on August 2009
 Sex Kitten
This tutorial is for those that have a working knowledge of Psp.
Supplies needed:
Tube of choice. I’m using the artwork of Keith Garvey. You have to purchase a license to use his work at MPT
Sex kitten Scrapkit - Made by Vicky. You can purchase the kit at her site Pink Princess Scraps
Template # 63 by Melissa - download for free from her blog here
Open your template in psp and change the canvas size to 600 by 600 to give you more room to work.
Then to save with a transperent background you just hide the white background - merge visable - delete the white background - then save as .png
Finished
Thankyou
This tut was created on July 2009
 Diner Days
This tutorial is for those that have a working knowledge of Psp.
Supplies needed:
Tube of choice. I’m using the artwork of Elias Chatzoudis. You have to purchase a license to use his work
Rock Around The Clock Scrapkit - You can purchase this kit from HERE
Template #232 by Missy - download for free from her blog here
Mask of choice
ok here we go...
Open your template in psp and change the canvas size to 600 by 600 to give you more room to work.
Then useing either colours or a scrap kit of choice fill in all the shapes on you template. Note: i deleted all the dotted lines.
Now on you 2 thinner rectangles add a colour from your tube then useing Xero - Fritallary use these settings 2,30,10,43 then click ok.
Now useing your tube of choice add it to your template then add a dropshadow.
Then select one of the smaller squares and fill it with a colour or paper of choice then add you tube invert and delete. I used Xero - Clarity set on 128 on my tubes in the squares. Do this with both.
Now useing your elements of choice dress up your tag. Note i used the line of notes and the checked floor shes sitting on.
Then add a mask of choice and your done.
Add your copyright and license number and name
Then to save with a transperent background you just hide the white background - merge visable - delete the white background - then save as .png
Finished
Thankyou
This tut was created on July 2009
 ToonTastic
Supplies needed:
Tube of choice. I’m using the artwork of Armando Huerta. You have to purchase a license to use his work Here
Mad Hatters Tea Party Scrapkit - You can purchase this kit from Here
Template # 177 by Missy - download for free from her blog Here
Ok first off open ur template in psp and change the canvas size to 600 by 600 to give you more room to work with.
Then to save with a transperent background you just hide the white background - merge visable - delete the white background - then save as .png
Finished
Thankyou
This tut was created on July 2009
 Hollywood Beauty
Supplies needed:
Tube of choice. I’m using the artwork of Jennifer Janesko. You have to purchase a license to use her work Here
She's A Star Scrapkit - You can purchase this kit from Here
Template # 67 by Melissa - download for free from her blog Here
ok here we go...
Then to save with a transperent background you just hide the white background - merge visable - delete the white background - then save as .png
Finished
Thankyou
This tut was created on July 2009