✿¸.•´ི♥All About Me♥ྀ `•.¸✿

My Photo
✿¸.•´ི♥Sexy Ash♥ྀ `•.¸✿
Mackay, QLD, Australia
Heya..Im Sexy Ash and im addicted to psp heehee.. ive been psping for about 5 or so yrs now and i love it.. Im a mum of a beautiful 5 yr old Hannah and she occupies most of my time. So i use psp to escape lol. Here ull find all my Tuts and Temps. If you have any questions please feel free to ask me!!
View my complete profile

✿¸.•´ི♥I CT For♥ྀ `•.¸✿

Photobucket Photobucket Photobucket

✿¸.•´ི♥TOU♥ྀ `•.¸✿

Please respect the time and effort that goes into these tutorials.

The creation, concept, and ideas of these tutorials is of my own imagination and design.

Should anything resemble another tutorial, this is only pure coincedence.

DO NOT copy my tutorials anywhere on the web or claim as your own!

I DO NOT give permission for my tutorials to be translated.

Please NO hotlinking, this is bandwidth theft!

DO NOT use my tutorials/ideas/supplies for commercial use or any other monetary gain


✿¸.•´ི♥Chat Box♥ྀ `•.¸✿

✿¸.•´ི♥Music♥ྀ `•.¸✿

Thursday, February 25, 2010

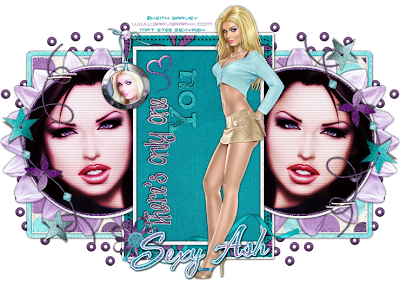
PostHeaderIcon Theres Only One You


This tutorial is for those that have a working knowledge of Psp.


Supplies needed:


Tube of choice.

I’m using the artwork of Keith Garvey. You have to purchase a license to use his work at MPT


Be You is made by Sarah and Tammykat and can be purchased at Pimp my Tags with Scraps


Template # 331 by Missy and you can grab it from her blog Divine Intentionz


Ok lets gets started


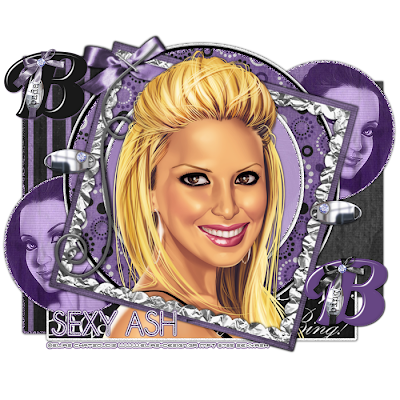
Open temp - Add tube of choice to your tag and place her to the right of the top square so it looks like shes leaning on the side. Add a dropshadow.


Now fill your shapes with papers from your kit until they are all completely full. Then add glittered egdes by Selecting the shape - float - defloat - modify - contract by 3 - invert - add 100 % noise - select none.


Then take a close up tube from the same artist and place in the smaller left circle - invert - delete excess - select none and add Xero - Radiance on default then change the blend mode to hard light and then lastly add Blinds 3,10,black. Then duplicate - mirror to the other circle.


Elements


Double staples - Resize by 50% and place over the top of the left circle - duplicate - mirror - flip.


Beads '2' - Copy paste onto your tag and place that layer onder all your other layers and place to the left - duplicate - mirror.


flower Frame '05' - Resize by 60% and place that layer under the cirlces and middle rectangle and position under the left circle - duplicate - mirror - dropshadow.


String Deco - Resize by 60% and add 30% noise - mirror and then place over the left circle under the staples - duplicate - mirror - flip


Heart '2' - Resize by 50% 3 times and add 50% noise - place in the top corner of the rectangle.


Wordart '5' - Resize by 50% - rotate 90% left and add 30% noise then place in the middle rectangle towards the left.


Circle frame '1' - Resize by 50$ twice and then hang off the top left corner of the rectangle - select inside the frame - add a grandiant and a copy of your tube inside - delete excess and change the blend mode to your tube to hard light.


Diamond - copy - paste and place over the bow of the frame.


Teal ribbon - Resize by 50% and rotate 90% to the left - place at the bottom of the rectangle - Then use the Ribbon Flower and resize that by 50% twice and place over the left end of the teal ribbon. Delete the bits of the Teal Ribbon you dont want showing.


Add your copyright and license number and name.

Then to save with a transperent background you just hide the white background - merge visable - delete the white background - then save as .png

Finished

Thankyou

This tut was created in Feb 2010
Wednesday, February 24, 2010

PostHeaderIcon Riot


This tutorial is for those that have a working knowledge of Psp.
Supplies needed:
Tube of choice. I’m using the artwork of Elias Chatzoudis. You have to purchase a license to use his work at MPT
Rock Princess kit is made by the Tamie and can be purchased at Addictive Pleasures
Template #333 made by Missy - download from her blog Divine Intentionz
Ok lets gets started
Open Temp

Copy and paste your tube onto your temp and add Xero- Radiance 170,152,0,232 and a dropshadow.
Add different papers from your kit to the shapes of your temp and then add glittered edges.
Glittered edges - Select the shape - float - defloat - modify - contract by 3 - invert - add 100 % noise - select none - add dropshadow and delete original layer.
After you add the paper to the 2 thin rectangles in the middle change the blend mode to soft light and delete the original layer.
Elements
Film - Resize by 70% and place in the middle of your temp under you tube. Fill the film squares with a gradiant made from 2 colours youve used in your tag. Then select the end square on the left and copy - paste a tube of choice into the square - invert - delete. Duplicate the tube - mirror - merge together and add Xero - Radiance on default settings - then change the blend mode to Luminance (L) and add blinds 3,10 black to the gradiant background.
Flame - Copy paste onto your tag - rotate 90% to the left and then place to the right so the bottom of the flame lines up with the bottom rectangle - drag that layer under the film - duplicate - mirror - merge together - select all - float - defloat - modify - contact by 3 - invert - add 100% noise - select none and add a dropshadow.
Ribbon '3' - resize by 50% - flip and place on the bottom right corner of the rectangle - duplicate - mirror - merge together - drag the layer under your tube.
Stars '2' - Rotate 90% left and place across the bottom of the rectangle under the ribbon.
Stars - Resize by 50% - place in the middle circle towards the right bottom - duplicate - mirror - flip and merge together - add 50% noise and a dropshadow.
Bow '2' - resize by 50% twice - place on the top corner of the film - duplicate - mirror
Add your copyright and license number and name.
Then to save with a transperent background you just hide the white background - merge visable - delete the white background - then save as .png
Finished
Thankyou
This tut was created in Feb 2010
Monday, February 22, 2010

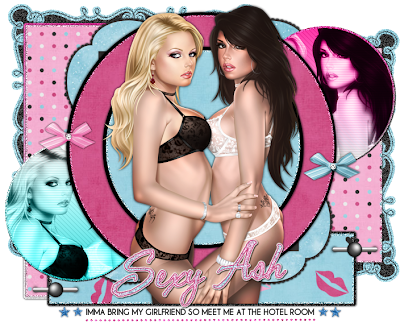
PostHeaderIcon Hotel Room


This tutorial is for those that have a working knowledge of Psp.
Supplies needed:
Tube of choice.
I’m using the artwork of Keith Garvey. You have to purchase a license to use his work at MPT
Fetish kit is made by my awsome friend Vicki and can be purchased at Pink Princess Scraps
Template # 329 by Missy and you can grab it from her blog Divine Intentionz

Ok lets gets started

Open Temp and delete the Words, Shape '1', Thin Rectangle 1 & 2, Dotted line and the Star.
Copy and paste your tube of choice and add Xero - Radiance and a dropshadow.
Then take the same tube and place over the Left circle - Delete excess and add Xero- Radiance with default settings - change blend mode to Luminance (L) and add Penta - Jeans with the settings 18,8 to the circles. Then add a glittered edge to the circle by selecting the shape - float - defloat - modify - contract by 3 - invert - add 100% noise - select none and add a drop shadow.
Repeat to the other circle.
Fill the shapes of your tag with different papers from your kit until they are all done. Add glittered edges to all your shapes aswell by selecting the shape - float - defloat - modify - contract by 3 - invert - add 100% noise - select none and add a drop shadow.
Elements
Element '49' - place on your tag and drag the layer under the circles - add dropshadow
Element '72' - Resize by 80% twice and drag the layer to the bottom placeing in the top corner - add 50% noise - duplicate - mirror - flip and line up with the square at the bottom right.
Bows - take the 2 different coloured bows and resize by 50% twice - then place one on the left just above the small circle, then place the other just below the right circle.
Add any extra elements that you want.
I also added wording to mine where the old wording was. Write what ever matches your tag
Add your copyright and license number and name.
Then to save with a transperent background you just hide the white background - merge visable - delete the white background - then save as .png
Finished

Thankyou

This tut was created in Feb 2010
Saturday, February 20, 2010

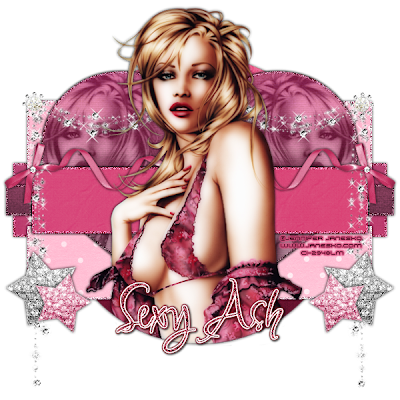
PostHeaderIcon Glamour Puss


This tutorial is for those that have a working knowledge of Psp.

Supplies needed:


Tube of choice.

I’m using the artwork of Jennifer Janesko. You have to purchase a license to use her work at CILM


Glamour Princess kit is made by the talented Tamie and can be purchased at Addictive Pleasures


Template #8 made by Me - download from my Blog

Ok lets gets started
Open Temp and delete the 2 thin rectangles in the middle.
Copy and paste your tube onto the temp and delete excess at the bottom then add Xero - Porcelain with these settings 50,128,128 and add a dropshadow.
Select the heart shape on ur temp and float - defloat - copy - paste a papers from your kit (i colourised mine) - delete - invert - modify - contract by 3 - invert - add 100% noise - select none - add dropshadow.
( the the same for the remaining rectangles)
Take a copy of your tube and place to the left she its in the heart and delete excess so it just shows in the heart shape - duplicate - mirror and add blinds 3,10 black to the tubes. Change the blend mode to Luminance (L) and the opacity to 50%.
Now select the bottom circle and copy paste a paper from the kit ur useing - inver - delete - select none and add drop shadow. Delete the smaller circle thats ontop of the large one.
Elements
Take the 'blingcurtain' and place on your canvas - resize by 70% and place so the two corners of the element line up with the top corners of the rectangle - duplicate and merge together (this makes it brighter)
Ribbon '4' - colourise and resize by 50% and place on one of the top corners of the middle rectangle - duplicate - mirror and merge together - move that layer under your tube.
Diamond - resize by 5% - sharpen and place over the bow - duplicate - mirror.
Diamond Star - Resize by 50% - duplicate - mirror and colourise the duplicated layer and then place next to the original - merge together - duplicate - mirror - Add dropshadow

Add your copyright and license number and name.
Then to save with a transperent background you just hide the white background - merge visable - delete the white background - then save as .png
Finished

Thankyou
This tut was created in Feb 2010

This awsome tut is written by Yvette and can be found here
It uses my template # 5
I think she did an AWSOME job!
-xx-
Friday, February 19, 2010

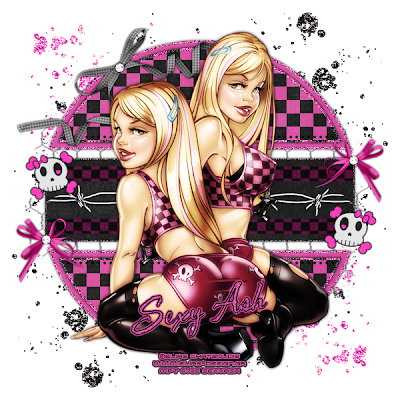
PostHeaderIcon Cute but Bad


This tutorial is for those that have a working knowledge of Psp.
Supplies needed:

Tube of choice. I’m using the artwork of Elias Chatzoudis. You have to purchase a license to use his work at MPT

Bute but Bad kit is made by the awsome Kristin and can be purchased at Scraps with Attitude

Template #3 made by Me - download from my Blog

Ok lets gets started
Open Temp
Delete the two vertical rectangles and the skullz.

Copy and paste your tube onto your temp and add Xero- Radiance 128,50,128,255 and a dropshadow.

Add different papers from your kit to the shapes of your temp and then add glittered edges.

Glittered edges - Select the shape - float - defloat - modify - contract by 3 - invert - add 100 % noise - select none - add dropshadow and delete original layer.

After you add the paper to the 2 thin rectangles in the middle change the blend mode to soft light and delete the original layer.

Elements

Copy and paste one of the skulls from the kit onto your tag - resize by 50% twice and rotate by 10% to the left. Place this skull over the left top corner of the big rectangle. Duplicate - mirror and place that one over the right bottom corner of the big rectangle.

Take wire '3' and resize by 50% and drag that layer to the very bottom.

Take one of the single bows and resize by 50% twice and place on the left bottom corner of the big rectangle - duplicate - mirror and place that on to the right corner of the big rectangle.

Diamond - resize by 10% and sharpen and place ontop of one of the bows - duplicate and place the other on the second bow.

Barbwire - resize by 50% twice - sharpen and place in the middle of the main rectangle.

Glitter splat - take one of the coloured splats and place in on ur tag - move to the top corner - duplicate - mirror - flip. Now take another colour and do the same but on the other side. Drag to the bottom and i deleted bits of the glitter i didnt want mainly in the middle.

Ribbon '3' - Rotate 40% left and resoze by 50% - sharpen and i changed the colour - then place it on the left side of the top half of the circle - add the same diamond as the other bows

Add your copyright and license number and name.
Then to save with a transperent background you just hide the white background - merge visable - delete the white background - then save as .png
Finished

Thankyou

This tut was created in Feb 2010


PostHeaderIcon Template # 8


Thursday, February 18, 2010

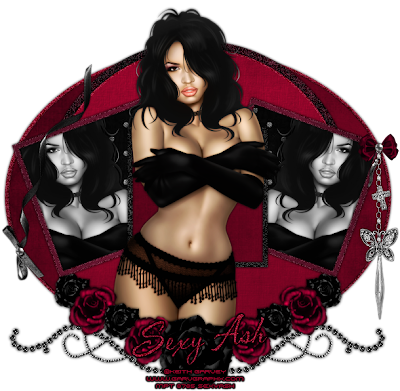
PostHeaderIcon Darkside


This tutorial is for those that have a working knowledge of Psp.

Supplies needed:

Tube of choice.

I’m using the artwork of Keith Garvey. You have to purchase a license to use his work at MPT

Gothic Princess kit is made by the talented Tamie and can be purchased at Addictive Pleasures

Template #7 made by Me - download from my Blog

Ok lets gets started


Open Temp
Next copy - paste your tube onto ur temp and delete the overhang at the bottom then add Xero- Radiance with these settinga 33,18,32,200 then add a dropshadow of choice.
Select the back oval - select all - float - defloat - copy - paste a paper from ur kit - invert - delete - select none.
On the very bottom oval add 50% noise
Repeat above steps on the circles aswell.
Onto the squares - Select the square on the left - select all - float - defloat - copy and paste another paper from your kit and also copy and paste your tube into the square aswell - invert and delete.
Repeat to the otherside
Merge you tubes in the squares together and change the blend mode to Luminance (L)
Now select the left squares frame and select all - float - defloat - add a paper from ur kit - invert - delete - invert - modify - contract by 2 - invert and add 100% noise - select none. Add dropshadow. Repeat to the right frame aswell.
Now select the middle square - float - defloat - copy and paste a colour or paper - invert - delete. Then for the frame select all - float - defloat - add a paper - invert - delete - select none and add 100% noise. Add dropshadow.
Elements -
Copy and paste the dangle 'jewel' element and resize by 50% and place to the right so it looks like its hanging from the square. Take a bow and resize and place it over the top of the chain in the jewel dangle.
Take the 'screw' and resize by 50% three times and place that over the bow.
Take the ribbon '4' - flip - mirror and resize by 50% - move to the left and place where you want. Then place the same screw from above over this bow aswell.
Now take the roses and resize to all different sizes and arrange at the bottom of the oval.
Lastly take the 'bling' element and place under the flowers and your tube and bring towards the bottom of the tag. See my tag for reference
Add your copyright and license number and name.
Then to save with a transperent background you just hide the white background - merge visable - delete the white background - then save as .png
Finished
Thankyou
This tut was created in Feb 2010

PostHeaderIcon Template # 7


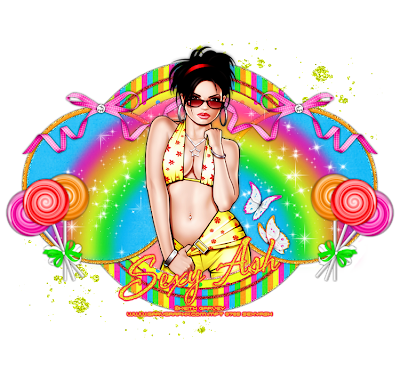
PostHeaderIcon SunnyDayz


This tutorial is for those that have a working knowledge of Psp.

Supplies needed:
Tube of choice. I’m using the artwork of Keith Garvey. You have to purchase a license to use his work at MPT
SunnyDayz kit is made by the awsome Kristin and can be purchased at Scraps with Attitude
Template #5 made by Me - download from my Blog


Ok lets gets started

Open Temp and change canvas size to 700 by 700 ( you might need to resize your shapes by 80% each)

Delete the diamond shape and raster 6 & 8

Copy and paste your tube of choice onto your tag and place in the middle of your tag - Delete the overhang at the bottom on the circle. Add Xero - Radience 70,193,39,162 - Duplicate and on this layer add Guassian blur set on 3 and then change the blend mode to Soft light. Add a dropshadow


Select the big circle and copy and paste a paper from your kit into the shape then invert - delete - invert - modify - contract by 3 - invert again and add 100% noise - Select none and add a dropshadow of choice.


Colourise raster 7 to a colour that goes with ur tube and then add 100% noise and a dropshadow.


Now onto your red circle - Select all - copy and paste your paper of choice - invert - delete - invert again - modify - contact by 3 and then delete on the paper layer and this should leave a red border around the circle. Then add 50% noise to the red circle and add dropshadows to both circles.


Now fill in the remaining shapes with papers from your kits giving the shapes glittered edges like with the first circle you did.


Now onto the elements-

Copy and paste the rainbow and place onto your tag, then line up with the 2 circles on the left and right so the rainbow looks like its comming out of the circles. I duplicated the rainbow to make it brighter but this is completly upto you.


Next take the pink bow and resize by 50% and place over the left circle and then take the diamond from the kit and resize by 15% and place over the bow. Merge these two together and duplicate then mirror.


Now take 3 different coloured lolliepops and place then on your canvas - rotate one 20% left and another one 20% right leaving one straight. Now place next to eachother and line up the sticks and place a bow (resize by 50% twice) over the where the sticks line up. Merge together and rotate 20% to the left and resize by 80% - place to the left - Duplicate and mirror


Add any extra elements you want.


Add your copyright and license number and name.
Then to save with a transperent background you just hide the white background - merge visable - delete the white background - then save as .png
Finished Thankyou This tut was created in Feb 2010

PostHeaderIcon Template # 6

Tuesday, February 16, 2010

PostHeaderIcon Tags made with my new temps :)

Im soo happi that everyone is likeing my temps.. (was scared noone would lol)

Heres some tags made with my HOT temp


PostHeaderIcon Template # 5

Heres my 5th Temp here :)
Monday, February 15, 2010

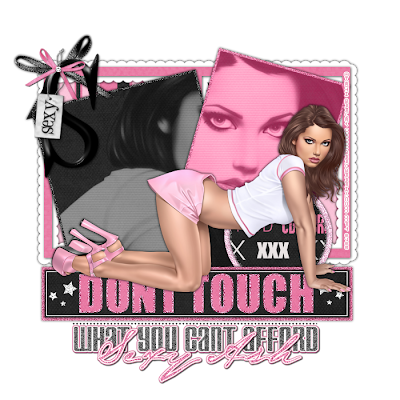
PostHeaderIcon Dont Touch


This tutorial is for those that have a working knowledge of Psp.

Supplies needed:
Tube of choice. I’m using the artwork of Keith Garvey. You have to purchase a license to use his work at MPT

PeepShow kit is made by Sarah and Tammykat and can be purchased at PMTWS site Here

Template #53 by Rose- download for free from her blog Rose's Place


Ok lets gets started
Open Temp and change canvas size to 700 by 700
Take your tube and place it ontop of the 'dont touch' wordart and add a dropshadow.
Useing your closeup tube place it over the two squares in the middle of your temp. Duplicate and on the original select the square on the left and delete excess - then on the duplicated layer delete the excess that overhangs on the right square. Then place the right square and closeup over the left square and closeup.
Now copy and paste a paper from your kit and fill the square on the right - delete excess
Do the same to the left square and then One square at a time select all - modify - contract by 3 - invert and add 50% noise.
Then back on the closeup tubes add Xero-Radiance with default settings and change the blend mode to luminace (legacy) and turn the opacty to 50%. Then add blinds 3,10,black to each of the sections of the closeup tube.
Now take the double frame from the kit and place over the 2 rectangles in the background and then delete those 2 rectangles. Add a paper to the middle of the frame and then add a dropshadow to the frame.
Add 2 different paper to the small circles on the right and add 100% noise to the bottom circle and add a dropshadow.
Select the 'dont touch' wordart - copy n paste a paper from your kit - invert - delete - inver again - modify - contract by 3 - invert - add 100% noise.
Then add 100% noise to the stars on the rectangle.
Onto the rectangle add a paper or papers of choice and delete excess.
Add a colour or paper to the 'what you cant afford' wording and add 50% noise and a gradient glow.
Lastly take the S-Sexy wordare and resize by 80% and place over the black bow of the double frame and useing a diamond of choice place that over the top of the bows where they match up in the middle.
Add your copyright and license number and name.
Then to save with a transperent background you just hide the white background - merge visable - delete the white background - then save as .png
Finished Thankyou
This tut was created in Feb 2010

PostHeaderIcon My Very First attempt a temps :)

You can find my first set HERE
Saturday, February 13, 2010

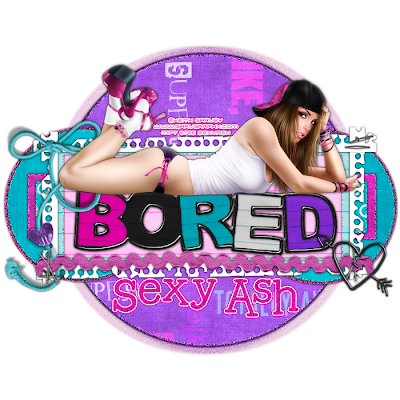
PostHeaderIcon Bored

This tutorial is for those that have a working knowledge of Psp.

Supplies needed:

Tube of choice. I’m using the artwork of Elias Chatzoudis. You have to purchase a license to use his work at MPT

Her High School Years kit is made by Sarah and can be purchased at PMTWS site Here

Template # 315 by Missy - download for free from her blog Divine Intentionz
Ok lets gets started
Open Temp and change canvas size to 700 by 700

Delete the word art, Small circle 3 and 4 and glittered circle 3.

Copy and Paste your tube onto your temp and duplicate. Add xero-radiance with these settings 133,157,36,156 to the original layer and then on the duplicated apply guassian blur by 3.00 abd change the blend mode to soft light. Add a dropshadow

Select the large circle - add paper - invert - delete - invert again - modify - contract by 4 - invert and add 100% noise. Add a dropshadow. Then duplicate and on the original add Toadies - What are you? with the overdose set on 10. Then add 50% noise.

Now fill the remaining shapes with papers from your kit adding Glittered borders like you did the the circle.
Now take frame '9' and copy n paste it onto your tag - mirror and place over the main rectangle on the temp. Add a dropshadow.
Then take the 'bored' wordart and place it in the rectangle towards the bottom and then take your tube and place it ontop on the wordart.
Next take the gel pen doodle heart '1' element and paste it onto your tag and resize by 50% - mirror and place on the right hand side on the corner if the frame.
Useing the ric rac '2' copy and paste onto your tag and place ot the bottom of the papered frame.
Add your copyright and license number and name.
Then to save with a transperent background you just hide the white background - merge visable - delete the white background - then save as .png
Finished Thankyou
This tut was created in Feb 2010
Wednesday, February 10, 2010

PostHeaderIcon Bada Bing!

This tutorial is for those that have a working knowledge of Psp.
Supplies needed:

Tube of choice. I’m using the artwork of Elias Chatzoudis. You have to purchase a license to use his work at MPT

Bada Bing kit is made by Sarah and TammyKat and can be purchased at PMTWS site Here

Template # 339 by Missy - download for free from her blog Divine Intentionz

Open Temp and change canvas size to 700 by 700
Delete the word art, bottom stars and small star, Dotted lines, Thin rectang '1', Shape '1', Thin rectangle '2'.

Copy and paste your tube onto your temp and place it in the middle of your tag so the bottom is at the bottom of the long rectange, add Xero-Porcelain with these settings 71,71,128 and then add a dropshadow.

Add papers to all your middle circles and i added glittered edges to two of the circles and you do that by selecting the shape - float - defloat - modify - contract by 3 or 4 - invert and add 100% noise.

Next add papers to the 2 squares and 1 rectangle and add a glittered edge to the top square on the left.

Onto the small circles - Select bottom one - copy and paste a paper of choice - invert - delete. Now select another tube from the same artist and add that to the circle also - delete excess. Add Xero-Radiance to the tube with default settings. Change the blend mode to Luminance (legacy) and opacity to 60% then lastly add blinds with these settings 3,10,black. Now click on the background to the circle and select all - float - defloat - modify - contract by 3.00 - invert and add 100% noise. While its inverted click on the tube thats in the circle and press delete so then you wont have over hang - select none and add a dropshadow. Do the same to the other circle.

Copy and paste the "bada" wordart onto your tag and resize by 50% once - sharpen and add a light dropshadow, place in the top corner. Now useing the "bing" wordare do the same as above but put it at the bottom right. Now take the diamond and resize by 20% and place onto the bow of the words, do this for both "bada" and "bing"

Now take frame '1' and place it onto your tag - rotate to the right by 15.00, place in desired position. Duplicate and move the bottom one underneath your main tube. Back onto the top frame layer delete the bits of the tag you dont need so it looks like the tube is comming out of the frame.

Lastly take the slider with the diamond and resize by 50% and place to the left just ontop of the small circle - duplicate - mirror on move that one so its just under the small circle on the right.

Add your copyright and license number and name.

Then to save with a transperent background you just hide the white background - merge visable - delete the white background - then save as .png

Finished
Thankyou

This tut was created in Feb 2010

Tuesday, February 9, 2010

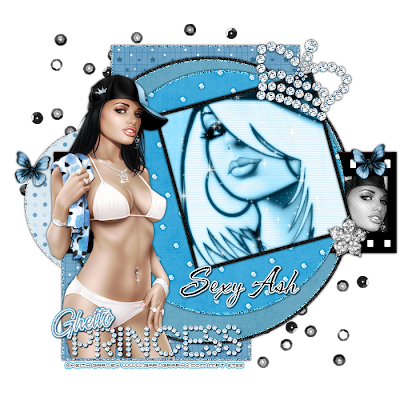
PostHeaderIcon Ghetto Princess


This tutorial is for those that have a working knowledge of Psp.
Supplies needed:


Tube of choice. I’m using the artwork of Keith Garvey. You have to purchase a license to use his work at MPT

Material Girl kit can be purchased at Vicky's blog Pink Princess

Template # 313 by Missy - download for free from her blog Divine Intentionz


Open Temp and change canvas size to 700 by 700
Delete the word art, small circle "2" and the tone layer.
Copy and paste your tube onto your temp and place to the left and add Xero-Radiance with these settings 11,98,74,215 and then add a dropshadow.
Now copy and paste a closeup tube and place into the small square - delete excess and add Xero - Radiance with default settings. Change the blend mode to Luminace (legacy) and add Blinds set at 3,10 black. Duplicate and add Guassian Blue at 2.00 to the bottom one and change the opacity to 60% on the top layer.
Next change the square border to black and add 50 noise and a dropshadow. Add a paper to the squares background and colourise.
Select large circle '2' and copy and paste a paper from you kit -invert - delete -inver again - modify - contract by 4 - invert and add 100% noise. Colourise to match your tube and add a dropshadow.
*Repeat above step to all the other shapes in you template until add the shapes are full.*
Take element '4' and colourise and resize by 50% - rotate by 20% to the right - Sharpen and place over the square.
Now useing Element '35' copy and paste onto your tag and place ontop of the long rectangle and move over to the right until one of the films squares is showing. move the rectangle aswell. Add a tube of choice into the films square that is showing on the right and delete excess. Change blend mode to Luminance (legacy) and add Penta Jeans with these settings 11,7.
Take the diamond Princess wordart and resize by 50% -colourise - sharpen. Place towards the bottom * look at above tag as reference *
Copy - paste element '38' onto the square with the closeup tube in it and delete excess - Sharpen.
Take the butterfly and colourise - resize by 50% twice and place in desired position.
Take element '37' and place it towards the top left corner - duplicate - flip - mirror, Make sure they r underneath all the other layers.
Add any extra elements you want :)
Add your copyright and license number and name. Then to save with a transperent background you just hide the white background - merge visable - delete the white background - then save as .png Finished
Thankyou This tut was created in Feb 2010
Friday, February 5, 2010

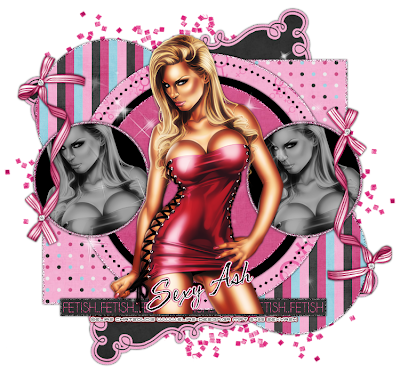
PostHeaderIcon Fetish


This tutorial is for those that have a working knowledge of Psp.

Supplies needed:

Tube of choice. I’m using the artwork of Elias Chatzoudis. You have to purchase a license to use his work at MPT

Fetish Kit can be purchased at Vicky's blog Pink Princess

Template # 326 by Missy - download for free from her blog Divine Intentionz

Open Temp and change canvas size to 700 by 700

Delete the hearts and the word art.

Take your tube and place into the moddle and delete excess. Now select one of the small circles on the side and copy and paste your tube into the shape invert - delete. Select none and add Xero- Radiance with these settings 128,50,128,255 then change the blend mode to luminace (legacy) and opacity to 70%. Add a paper of choice to the background of the circle and add a dropshadow. Repeat to the other Circle.

Fill the remaining shapes with papers from your kit and add glittered egdes to all of the shapes and you do that by selecting the shape - float - defloat - modify - contracy by 3 or 4 (depending how fat you want your boarder) invert and add 100% noise. Select none and add a dropshadow.

Select element 27 from the kit and resize by 80% twice and rotate by 5.00 to the right. Adjust sharpness and sharpen once. So the same for the other size except rotate to the left and mirror.

Take a diamond of choice and add to the middle of the bows.

Copy and paste element 71 rotate 15.00 to the left - sharpen and add a dropshadow and place underneath all the layers.

With element 37 placeunderneath your main tube and sharpen once.

Take element 24 and copy and paste onto your tag and place underneath all the layers and place toward the top corner - duplicate - mirror - flip.

Lastly choose a word that goes with you tag (i used Fetish) and add it to the thin rectangle. Then i added 70% noise.

Add your copyright and license number and name. Then to save with a transperent background you just hide the white background - merge visable - delete the white background - then save as .png Finished


Thankyou This tut was created in Feb 2010


✿¸.•´ི♥Blinkie♥ྀ `•.¸✿

Photobucket

✿¸.•´ི♥Contact Me♥ྀ `•.¸✿

If you have any troubles or want to send me your results to my tuts then please feel free to email me and ill get back to you as soon as i can. Ty ashleymarlin@bigpond.com

✿¸.•´ི♥Forums I Love♥ྀ `•.¸✿

Photobucket Photobucket Photobucket Photobucket

✿¸.•´ི♥Blog Buds♥ྀ `•.¸✿

Photobucket Photobucket Photobucket Photobucket Photobucket Photobucket Photobucket Photobucket Photobucket Photobucket Photobucket Photobucket Photobucket Photobucket Photobucket Photobucket

✿¸.•´ི♥Followers♥ྀ `•.¸✿