✿¸.•´ི♥All About Me♥ྀ `•.¸✿

- ✿¸.•´ི♥Sexy Ash♥ྀ `•.¸✿
- Mackay, QLD, Australia
- Heya..Im Sexy Ash and im addicted to psp heehee.. ive been psping for about 5 or so yrs now and i love it.. Im a mum of a beautiful 5 yr old Hannah and she occupies most of my time. So i use psp to escape lol. Here ull find all my Tuts and Temps. If you have any questions please feel free to ask me!!
✿¸.•´ི♥I CT For♥ྀ `•.¸✿


✿¸.•´ི♥Music♥ྀ `•.¸✿


 Emo Cutie

This tutorial is for those that have a working knowledge of Psp.
Supplies needed:
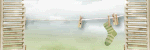
Tube of choice. I’m using the artwork of Elias Chatzoudis. You have to purchase a license to use his work at MPT
Punk Princess kit - is made by Kristin but can no longer be downloaded from her blog, just use a similar one :)
Template # 72 by Kristin - download for free from her blog here
ok here we go...
Open your template in psp and change the canvas size to 600 by 600 to give you more room to work.
Add tube then useing xero- radience add with these settings 38,50,16,115 and place in desired postion. add dropshadow - Duplicate and use sections of the extra tube to fill in the pink rectangles if you want that effect. I changed the blend mode to luninance (legancy)
Now select your bottom rectangel - select all float defloat, on a new raster layer add a colour of choice - select none. Add 50% noise, Now on your original layer resize by 98% and i removed the TONE layer.. add dropshadow to layer with noise.
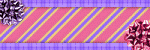
Now on the pink rectangles i added PhotoEffex-Scanlines with these settings 1,2,20,10,0,0 vut if you dont have that then you can use blinds also
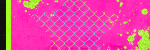
Now on your black rectange all Weave with these settings 1,5,5 colour of choice
I also changed the colour to my middle smaller rectange to suit my tag
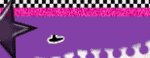
Now useing the barb wire from the kit add a dropshadow - duplicate and mirror.. now merge together and move into the middle of your canvas
Add additional elements of choice
Add your copyright and license number and name
Then to save with a transperent background you just hide the white background - merge visable - delete the white background - then save as .png
Finished
Thankyou
This tut was created on August 2009

✿¸.•´ི♥Blinkie♥ྀ `•.¸✿

✿¸.•´ི♥Forums I Love♥ྀ `•.¸✿


✿¸.•´ི♥Blog Buds♥ྀ `•.¸✿


1 comments:
Here's mine done in the forum ;)
http://i28.tinypic.com/onst2.png
hope your hand is on the mend hun!!
Hugs from Vaybs
Post a Comment