✿¸.•´ི♥All About Me♥ྀ `•.¸✿

- ✿¸.•´ི♥Sexy Ash♥ྀ `•.¸✿
- Mackay, QLD, Australia
- Heya..Im Sexy Ash and im addicted to psp heehee.. ive been psping for about 5 or so yrs now and i love it.. Im a mum of a beautiful 5 yr old Hannah and she occupies most of my time. So i use psp to escape lol. Here ull find all my Tuts and Temps. If you have any questions please feel free to ask me!!
✿¸.•´ི♥I CT For♥ྀ `•.¸✿


✿¸.•´ི♥Music♥ྀ `•.¸✿


 Hardcore


HAdoubleLOWdoubleEN


Halloween Town

This tutorial is for those that have a working knowledge of Psp.
SpellBound


Brrr

Cool Rebel

Sk8er Chick


Glitzy Dame
 This tutorial is for those that have a working knowledge of Psp.
Supplies needed:
Tube of choice.
I’m using the artwork of Keith Garvey. You have to purchase a license to use her work Here
Glitzy Dame kit by TammyKat and can be purchased at
Pimp my Tags with ScrapsTemplate " Lips like Sugar" by Cakes and you can find it at her blog Here
Ok lets gets started
Open temp and change canvas size to 700 by 700
Add your tube of choice onto your tag and place where you want it. Add Xero Radiance with these settings 22,106,113,198. Add a dropshodow.
Fill in all your shapes with papers from your kit by selecting the shape - float - defloat - place paper over the shape - invert - delete - select none and delete original layer.
Then add glittered edges to all your shapes by after doing the above steps select the shape again - float - defloat - modify - contract by 2 - invert - add 100% noise and select none. Add Dropshadow.
Square - Select inside the squares and add a paper of choice - then copy and paste your tube of choice into the square - invert - delete - select none - add Xero Radiance on default and change the blend mode to Hardlight and then add Blinds set on 4,10,black onto the paper background..
Elements
Ribbon 1 - Resize by 50% and mirror - select all - float - defloat - modify - contract by 2 - invert and add 100% noise - select none and add a dropshadow.
Button - Resize by 50% three times and place over the bow on ribbon 1.
Paperstrip - Copy and paste onto your tag and place at the bottom left corner - drag layer under wordart.
Pink Flower - Resize by 50% and place over the flower section on the paperstrip element.
Grey Flower - Resize by 50% - sharpen and place in the bottom right corner.
Add your copyright and license number and name.
Then to save with a transperent background you just hide the white background - merge visable - delete the white background - then save as .png
Finished
Thankyou
This tut was created in August 2010
Dont Bug Me

This tutorial is for those that have a working knowledge of Psp.
Supplies needed:
Tube of choice.
I’m using the artwork of Elias Chatzoudis. You have to purchase a license to use her work Here
Dont Bug Me kit by TammyKat and can be purchased at
Pimp my Tags with ScrapsTemplate # 2 made by Linda and Rose and you can find it at the Creative Misfits Creations Blog
Ok lets gets started
Open temp and change canvas size to 700 by 700
Delete all wording
Add your tube of choice onto your tag and place where you want it. Add Xero Radiance with these settings 18,148,173,186. Add a dropshodow.
Fill in all your shapes with papers from your kit by selecting the shape - float - defloat - place paper over the shape - invert - delete - select none and delete original layer.
Then add glittered edges to all your shapes by after doing the above steps select the shape again - float - defloat - modify - contract by 2 - invert - add 100% noise and select none. Add Dropshadow.
Squares - Select inside the squares and add a gradiant of choice - then copy and paste tubes of choice into the squares - invert - delete - select none and merge together - add Xero Radiance with the same settings as above and change the blend mode to screen and then add Blinds set on 4,10,black.
Elements
Grass - Resize by 50% and place to the bottom left - duplicate and mirror - merge together and duplicate again - on the bottom layer add Guassian blur set of three and add 100% noise
Lady Bug - Pick two colours and resize one by 50% and the other by 50% twice - arrange in the bottom corner near the grass - merge together and duplicate - mirror - merge those together and add a dropshadow.
Sun - Resize by 50% and add 40% noise - place in the top right corner.
Cloud - Resize by 50% and add 100% noise to the dark blue edge and then place near the sun - duplicate and place on the other side of the sun.
Butterfly - Resize by 50% and rotate by 15% and place in the top left corner.
Ribbon Frame - Resize by 50% and roate 90% and place over the little squares - duplicate and mirror - merge together and add a dropshadow.
.Add your copyright and license number and name.
Then to save with a transperent background you just hide the white background - merge visable - delete the white background - then save as .png
Finished
Thankyou
This tut was created in August 2010
Baby Blue

This tutorial is for those that have a working knowledge of Psp.
Supplies needed:
Tube of choice.
I’m using the artwork of Keith Garvey. You have to purchase a license to use her work Here
Sweet Baby Boy by Sarah and can be purchased at
Pimp my Tags with ScrapsTemplate # 334 made by Missy and you can download it at Divine Intentionz
Ok lets gets started
Open temp and change canvas size to 700 by 700
Delete all wording
Add your tube of choice onto your tag and place where you want it. Add a dropshodow.
Fill in all your shapes with papers from your kit by selecting the shape - float - defloat - place paper over the shape - invert - delete - select none and delete original layer.
Then add glittered edges to all your shapes by after doing the above steps select the shape again - float - defloat - modify - contract by 2 - 4 - invert - add 100% noise and select none. Add Dropshadow.
Use a close up tube of choice and add it to the two single circles to the left and right - invert and delete - select none - add Xero Radiance on default to the tubes and then change the blend mode to multiply.
Elements
Ribbon 2 - Resize by 50% and place over the top of the left circle - duplicate and mirror. Merge together and add a dropshadow.
Button 4 - Resize by 50% three times and place over the bow of ribbon 2 - duplicate and mirror. merge together and sharpen.
Star 1 - Resize by 50% and then duplicate twice - resize those two to different sizes and arrange in the top left corner.
Clip - Resize by 50% and mirror and then place over the right rectangle.
Bubbles - Resize by 50% twice and duplicate then place in desired position.
Flowers - Resize and arrange in the bottom left corner.
Wordart - Resize by 90% and add 100% noise - place at the bottom and erase a section so it looks like its weaving thro the tube.
.Add your copyright and license number and name.
Then to save with a transperent background you just hide the white background - merge visable - delete the white background - then save as .png
Finished
Thankyou
This tut was created in August 2010
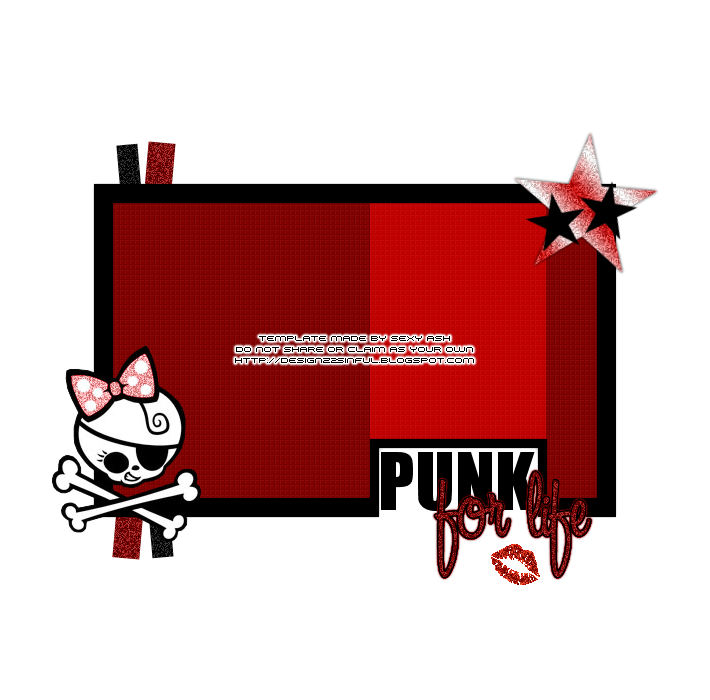
Skullicious
 This tutorial is for those that have a working knowledge of Psp.Supplies needed:
Tube of choice.
I’m using the artwork of Elias Chatoudis. You have to purchase a license to use her work Here
Heart Skullz kit by TammyKat and can be purchased at Pimp my Tags with Scraps
Template # 3 made by Kristin and you can download it at the Creative Misfit Creations Blog
Ok lets gets started
Open temp and change canvas size to 700 by 700
Delete skull
Add your tube of choice onto your tag and place where you want it. Then duplicate and on this layer add Guassian blur set on 3 and change blend mode to softlight. Add a dropshadow to the original layer.
Fill in all your shapes with papers from your kit by selecting the shape - float - defloat - place paper over the shape - invert - delete - select none and delete original layer.
Then add glittered edges to all your shapes by after doing the above steps select the shape again - float - defloat - modify - contract by 2 - 4 - invert - add 100% noise and select none. Add Dropshadow.
Change the blend mode to overlay on the pixel wordart layer.
Elements
Tabs - Take two of your pick and add them to the top left rectangle and bottom right rectangle. Add dropshadow.
Black Frame - Copy and paste onto your tag - drag layer under the thin rectangle - select inside the frame and add a gradient of choice - select none
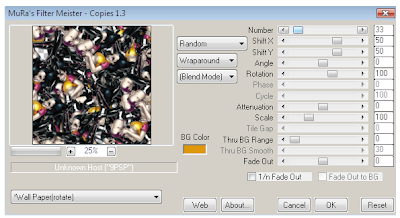
Take a copy of your tube and add Mura's Copies with this setting
~ IM BACK ~
Kinky
 This tutorial is for those that have a working knowledge of Psp.
Supplies needed:
Tube of choice.
I’m using the artwork of Barbara Jensen. You have to purchase a license to use her work Here
PeepShow collab kit by TammyKat and Sarah and can be purchased at
Pimp my Tags with ScrapsTemplate # 338 made by Missy and you can download it at Divine Intenionz
Ok lets gets started
Open temp and change canvas size to 700 by 700
Add your tube and add a dropshadow.
Fill in all your shapes with papers from your kit by selecting the shape - float - defloat - place paper over the shape - invert - delete - select none and delete original layer.
Then add glittered edges to all your shapes by after doing the above steps select the shape again - float - defloat - modify - contract by 4 - invert - add 100% noise and select none. Add Dropshadow.
Add tubes into the bottom frame and the two single squares on both the left and the right.
Frame - Change the blend mode to the tubes to hardlight
Single Squares - Add Xero Radiance on default to the tunes and change the blend mode to luminance - lower the opacity to 60% and then add blinds 3,10 black.
Elements
Circle frame - Place onto your tag over the middle circle and drag the layer down until its just ontop of the top circle.
Black frame - place over the left side of the large square at the bottom - duplicate - mirror and delete the excess that overhangs - merge together.
Wordart - "sexy" and "girls" resize by 50% and place on either side of the bottom frame.
Censor ribbon - resize by 90% twice and drag below your tube - place over the two single squares.
Pink Flower - resize by 50% and place under the left side of the single squares - duplicate and resize by 80% - place just to the right of the original flower - merge together - duplicate and mirror.
Peepshow Sign - Resize by 50% twice and rotate left by 5 and place where mine is - drag below your tube.
Add your copyright and license number and name.
Then to save with a transperent background you just hide the white background - merge visable - delete the white background - then save as .png
Finished
Thankyou
This tut was created in May 2010
Bad Bitch
 This tutorial is for those that have a working knowledge of Psp.
Supplies needed:
Tube of choice.
I’m using the artwork of Ismael Rac. You have to purchase a license to use his work at AMI
Bad Girls Club kit by TammyKat and can be purchased at
Pimp my Tags with ScrapsTemplate # 31 made by Myself
Ok lets gets started
Open temp and change canvas size to 700 by 700
Delete the two thin rectangles.
Fill in all your shapes with papers from your kit by selecting the shape - float - defloat - place paper over the shape - invert - delete - select none and delete original layer.
Then add glittered edges to all your shapes by after doing the above steps select the shape again - float - defloat - modify - contract by 4 - invert - add 100% noise and select none. Add Dropshadow.
Copy and paste your tube of choice and add Xero-Radiance 43,83,85,147 and add a dropshadow.
Elements
Purple Tripleframe - copy and paste onto your tag and place over the 3 small squares in the middle of your tag - add a close up tube into the frame - invert and delete - then add Xero Radiance on default to the tubes- change blend mode to softlight.
Staples - resize by 50% twice and place over the top left corner of the frame - duplicate - mirror - duplicate and flip.
Frame 1 - Copy and paste onto your tag and drag below the middle triple frame - add closeup tube and delete excess - add Xero Radiance on default and add blinds 3,10 black.
Skull 2 - resize by 50% twice and colourise to match your tag - place where you want on yout tag.
Add your copyright and license number and name.
Then to save with a transperent background you just hide the white background - merge visable - delete the white background - then save as .png
Finished
Thankyou
This tut was created in May 2010
Addicted to You
 This tutorial is for those that have a working knowledge of Psp.
Supplies needed:
Tube of choice.
I’m using the artwork of Keith Garvey. You have to purchase a license to use his work at MPT
Come and Get It kit by Sarah and can be purchased at Pimp my Tags with Scraps
Template # 84 made by Yvette and you can download it at Essence of Creativity
Ok lets gets started
Open temp and change canvas size to 700 by 700
Them take your tube and place her to the left of your tag and add Xero Radiance on default and add a dropshadow.
Fill in all your shapes with papers from your kit by selecting the shape - float - defloat - place paper over the shape - invert - delete - select none and delete original layer.
Then add glittered edges to the main rectangle by after doing the above steps select the shape again - float - defloat - modify - contract by 4 - invert - add 100% noise and select none. Add Dropshadow.
Add a closeup tube to the frame section - invert and delete excess - select none and add Xero Radiance on default - then change the blend mode to Luminance and lower the opacity to 50% - then on the paper background add Penta's Jeans set on 14,5.
Then on the thin rectangles add Penta's Jeans set on 62,4.
Elements
Flowers - resize 2 different flowers by 50% and arrange at the bottom right of your tag.
Ribbon 2 - Resize by 50% and mirror - drag the layer under the flowers and place at the bottom right.
Tag 2 - Resize by 80% twice and mirror - place at the top right corner and add some wording to the tag.
Lolliepops - Rotate by 10 and resize by 50% - duplicate and mirror - arrange together and then merge together. Add them to the floer arrangement and drag layer under the flowers.
Add your copyright and license number and name.
Then to save with a transperent background you just hide the white background - merge visable - delete the white background - then save as .png.
Finished
Thankyou
This tut was created in May 2010
Beautiful
 This tutorial is for those that have a working knowledge of Psp.
I’m using the artwork of Sonia Roji. You have to purchase a license to use her work at MPT
This tut was created in May 2010
Addiction

Supplies needed:
Template # 287 made by Missy and you can download it at Divine Intentionz
Thankyou
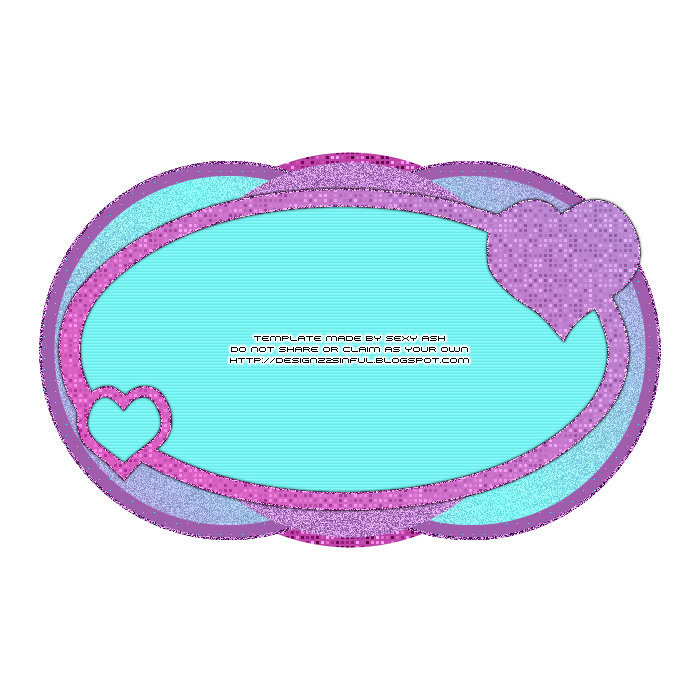
Sugar Rush

This tutorial is for those that have a working knowledge of Psp.
Supplies needed:
Tube of choice.
I’m using the artwork of Elias Chatzoudis. You have to purchase a license to use his work at MPT
Sugar Rush kit by Tammykat and can be purchased at Pimp my Tags with Scraps
Template # 322 made by Missy and you can download it at Divine Intentionz
Ok lets gets started
Open temp and change canvas size to 700 by 700
Delete all the wordart.
Them take your tube and place her in the middle of your tag and duplicate - on this copy add Guassian Blur set on 3 and change the blend mode to softlight and then on the original add Xero Radiance with these settings 206,55,48,152 and add a dropshadow.
Fill in all your shapes with papers from your kit by selecting the shape - float - defloat - place paper over the shape - invert - delete - select none and delete original layer.
Then add glittered edges to all your shapes by after doing the above steps select the shape again - float - defloat - modify - contract by 4 - invert - add 100% noise and select none. Add Dropshadow.
Then add your own words to the thin rectangle where the old words were.
Elements
Blue Ruffel - Resize by 50% and place over the bottom thin rectangle and then drag that layer under the heart.
Arrange some Hearts from your kit over the heart thats in the bottom corner and when your happy delete the original heart.
Circle Frame *pink* - place on your tag and then drag the layer down until its just ontop of the middle circle.
Ribbon 2 - Take two different coloured ones and place them on your tag - resize by 50% and place one on the left top of the middle rectangle - then place the other on the other side - drag under your tube.
Black button with ribbon - Resize by 50% and place over the corner of the above ribbon - duplicate and mirror.
Flowers - add two different coloured flowers and resize by 50% - sharpen - then arrange at the top of the right circle - merge together and duplicate - mirror and flip.
Add your copyright and license number and name.
Then to save with a transperent background you just hide the white background - merge visable - delete the white background - then save as .png
Finished
Thankyou
This tut was created in May 2010
Be Beautiful

Supplies needed:
Template # 1 made by Me found at the Creative Misfits Creations blog Here
Thankyou
Bada Bang

Supplies needed:
Template # 34 made by Me found at my blog
Thankyou
Guitar Girl
 This tutorial is for those that have a working knowledge of Psp.
Guitar Star kit is made by my awsome friend Tamie and you can grab it for free at Addictive Pleasures
Template #33 made by Me
Ok lets gets started
Elements
Wire 3 - copy and paste onto your tag - resize by 80% and drag to the bottom - add 50% noise and a dropshadow.
Chain 4 - Resize by 50% and place over the right square - duplicate and mirror - merge together and drag below your main tube.
Sparkle Wings - Resize by 80% twice and place just under the main tube - sharpen twice and add a dropshadow.
Barbed Wire - Resize by 90% and place at the bottom of the film - duplicate and place that one at the top of the film.
Rose - Resize by 50% twice and place at the right side of the film - duplicate and mirror.
Bow 3 - Resize by 50% three times and place over the stem of the rose - duplicate and mirror.
Add any extra elements you want to make the tag your own :)
Add your copyright and license number and name.
Then to save with a transperent background you just hide the white background - merge visable - delete the white background - then save as .png
Finished
Thankyou
This tut was created in May 2010
Bad Girls

Bad Girl kit is made by my awsome friend Tamie and can be purchased at Addictive Pleasures
Template #329 made by Missy - download from her blog Divine Intentionz
Ok lets gets started
Elements
Ribbon - resize by 50% and place on top of the left rectangle
Screw- Resize by 50% three times and duplicate twice - place over the bows in the ribbon.
Fan - copy and paste onto your tag and place under your tube.
Wire - Copy and paste onto your tag and place in the middle then drag this layer under all the circles.
Streamer - resize by 50% and flip - then place at the bottom left of the rectangle - duplicate and mirror.
Bow 2 - resize by 50% twice and place over your streamer - duplicate and mirror.
Buckle Ribbon - Resize by 50% and place under the two bows (2).
Sign 2 - resize by 50% twice and sharpen - then rotate 10.00 to the left and place where mine is.
hand cuffs - resize by 50% twice and place at the top corner.
Add your copyright and license number and name.
Then to save with a transperent background you just hide the white background - merge visable - delete the white background - then save as .png
Finished
Thankyou
This tut was created in May 2010
Come Get it

Supplies needed:
Template # 353 made by Missy and you can download it at Divine Intentionz
Thankyou
Cheeky

Supplies needed:
Thankyou
Take a Picture
Supplies needed:
Template # 115 made by Yvette found at Essence of Creativity
Then to save with a transperent background you just hide the white background - merge visable - delete the white background - then save as .png
Finished
Thankyou
This tut was created in May 2010
✿¸.•´ི♥Blinkie♥ྀ `•.¸✿

✿¸.•´ི♥Forums I Love♥ྀ `•.¸✿


✿¸.•´ི♥Blog Buds♥ྀ `•.¸✿