✿¸.•´ི♥All About Me♥ྀ `•.¸✿

- ✿¸.•´ི♥Sexy Ash♥ྀ `•.¸✿
- Mackay, QLD, Australia
- Heya..Im Sexy Ash and im addicted to psp heehee.. ive been psping for about 5 or so yrs now and i love it.. Im a mum of a beautiful 5 yr old Hannah and she occupies most of my time. So i use psp to escape lol. Here ull find all my Tuts and Temps. If you have any questions please feel free to ask me!!
✿¸.•´ི♥TOU♥ྀ `•.¸✿
The creation, concept, and ideas of these tutorials is of my own imagination and design.
Should anything resemble another tutorial, this is only pure coincedence.
DO NOT copy my tutorials anywhere on the web or claim as your own!
I DO NOT give permission for my tutorials to be translated.
Please NO hotlinking, this is bandwidth theft!
DO NOT use my tutorials/ideas/supplies for commercial use or any other monetary gain
✿¸.•´ི♥Chat Box♥ྀ `•.¸✿
✿¸.•´ི♥Lables♥ྀ `•.¸✿
- Addictive Pleasures - Tutorial
- Collab Templates
- Crafty Chick Exclusive Tag Templates
- FTU tutorial
- Juicy Bits Exclusive Tag Template
- Misfit - Templates
- No Scraps Tutorial
- Pink Pleasure - Tutorial
- Pink Princess Scraps - Tutorial
- PMTWS - Tutorial
- Scraps With Attitude - Tutorial
- Tag Template
- Toxic Desirez - Tutorial
✿¸.•´ི♥Music♥ྀ `•.¸✿
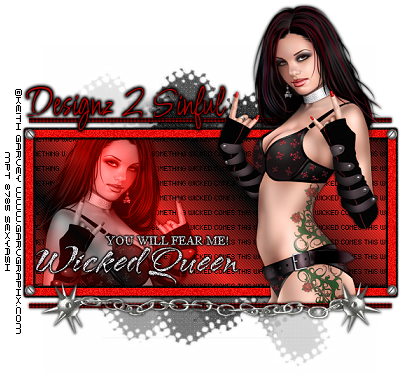
 Something Wicked
This tutorial is for those that have a working knowledge of Psp.
Supplies needed:
Tube of choice. I’m using the artwork of Keith Garvey. You have to purchase a license to use his work at MPT
Template # 66 by Kristin - download for free from her blog Toxic Desirez
Elements and Mask of Choice
ok here we go...
Open your template in psp and change the canvas size to 600 by 600 to give you more room to work.
Now on your template delete the pointed circle, bat, dotted border and the wicked babe word art.
Copy and paste your tube onto your canvas - add a dropshadow - delete excess and add Xero-Radience with these settings 45,87,0,117
Select your main rectangle and fill with a gradient with two colours from your tube. Add penta-Jeans set at 20,4
Add a colour to your "you will fear the wicked queen" word art and then add noise at 50% - sharpen and add a gradient golw
Now select your border and useing a colour that matches your tube and floodfill with the colour and add a small amount of noise. add a gradient glow
Click on your thin rectangles and add a colour, Useing textured effect - Weave set at 1,1,5 (a different colour) add that to your shape
Now duplicate your tube and mirror it. Then place on the left of your tag and delete excess tube. Change the blend mode to Luminance (legacy) and change the opacity to 70%
NOTE: youll have to delete some of the wording in the main rectange so it doesnt show thro the tube.
Add a mask of choice and then useing penta's-colourdot set at 70,6,255,255,255 add this to your mask. Then useing dsb flux - Bright noise 25% Lighter click ok
Now add your elements of choice to finish off your tag.
Add your copyright and license number and name
Then to save with a transperent background you just hide the white background - merge visable - delete the white background - then save as .png
Finished
Thankyou
This tut was created on July 2009

✿¸.•´ི♥Contact Me♥ྀ `•.¸✿
✿¸.•´ི♥Forums I Love♥ྀ `•.¸✿


0 comments:
Post a Comment