✿¸.•´ི♥All About Me♥ྀ `•.¸✿

My Photo
✿¸.•´ི♥Sexy Ash♥ྀ `•.¸✿
Mackay, QLD, Australia
Heya..Im Sexy Ash and im addicted to psp heehee.. ive been psping for about 5 or so yrs now and i love it.. Im a mum of a beautiful 5 yr old Hannah and she occupies most of my time. So i use psp to escape lol. Here ull find all my Tuts and Temps. If you have any questions please feel free to ask me!!
View my complete profile

✿¸.•´ི♥I CT For♥ྀ `•.¸✿

Photobucket Photobucket Photobucket

✿¸.•´ི♥TOU♥ྀ `•.¸✿

Please respect the time and effort that goes into these tutorials.

The creation, concept, and ideas of these tutorials is of my own imagination and design.

Should anything resemble another tutorial, this is only pure coincedence.

DO NOT copy my tutorials anywhere on the web or claim as your own!

I DO NOT give permission for my tutorials to be translated.

Please NO hotlinking, this is bandwidth theft!

DO NOT use my tutorials/ideas/supplies for commercial use or any other monetary gain


✿¸.•´ི♥Chat Box♥ྀ `•.¸✿

✿¸.•´ི♥Music♥ྀ `•.¸✿
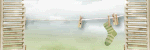
Sunday, May 16, 2010

PostHeaderIcon Guitar Girl

This tutorial is for those that have a working knowledge of Psp.
Supplies needed:
Tube of choice.
I’m using the artwork of Sonia Roji. You have to purchase a license to use her work at MPT

Guitar Star kit is made by my awsome friend Tamie and you can grab it for free at Addictive Pleasures

Template #33 made by Me

Ok lets gets started

Open temp and change canvas size to 700 by 700

Take your tube and place her in the middle of your tag - duplicate and on this layer Guassian blur set on 3 and change then blend mode to soft light. Then on the original add Xero Radiance with these settings 156,66,14,224 and add a dropshadow.
Fill in all your shapes with papers from your kit by selecting the shape - float - defloat - place paper over the shape - invert - delete - select none and delete original layer.

Then add glittered edges to all your shapes by after doing the above steps select the shape again - float - defloat - modify - contract by 4 - invert - add 100% noise and select none. Add Dropshadow.

Film - fill in the film squares with tubes - invert and delete - select none - merge the tubes in the film together and add xero radiance on default - then change the blend mode to multiply and add blinds 3,10 black.

Elements

Wire 3 - copy and paste onto your tag - resize by 80% and drag to the bottom - add 50% noise and a dropshadow.

Chain 4 - Resize by 50% and place over the right square - duplicate and mirror - merge together and drag below your main tube.

Sparkle Wings - Resize by 80% twice and place just under the main tube - sharpen twice and add a dropshadow.

Barbed Wire - Resize by 90% and place at the bottom of the film - duplicate and place that one at the top of the film.

Rose - Resize by 50% twice and place at the right side of the film - duplicate and mirror.

Bow 3 - Resize by 50% three times and place over the stem of the rose - duplicate and mirror.

Add any extra elements you want to make the tag your own :)

Add your copyright and license number and name.

Then to save with a transperent background you just hide the white background - merge visable - delete the white background - then save as .png

Finished
Thankyou
This tut was created in May 2010


0 comments:

Post a Comment

✿¸.•´ི♥Blinkie♥ྀ `•.¸✿

Photobucket

✿¸.•´ི♥Contact Me♥ྀ `•.¸✿

If you have any troubles or want to send me your results to my tuts then please feel free to email me and ill get back to you as soon as i can. Ty ashleymarlin@bigpond.com

✿¸.•´ི♥Forums I Love♥ྀ `•.¸✿

Photobucket Photobucket Photobucket Photobucket

✿¸.•´ི♥Blog Buds♥ྀ `•.¸✿

Photobucket Photobucket Photobucket Photobucket Photobucket Photobucket Photobucket Photobucket Photobucket Photobucket Photobucket Photobucket Photobucket Photobucket Photobucket Photobucket

✿¸.•´ི♥Followers♥ྀ `•.¸✿